


How to Build a Wooden Planter
What Do You Mean by Building a Wooden Planter?

Building a wooden planter involves constructing a box-like structure out of wood that is designed to hold soil and plants for gardening purposes. Wooden planters are a popular choice for many gardeners due to their natural look and versatility in terms of size, design, and placement.
How Can You Build a Wooden Planter?

Image Source: etsystatic.com
Building a wooden planter is a relatively simple DIY project that can be completed with basic woodworking skills and tools. Here is a step-by-step guide on how to build your own wooden planter:
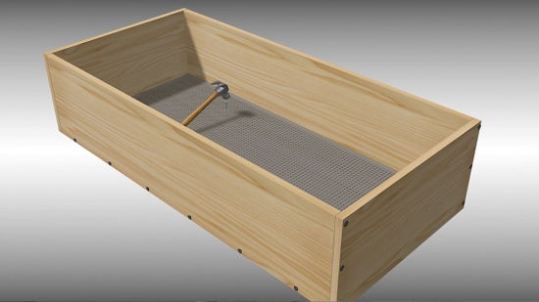
What is Needed to Build a Wooden Planter?
Image Source: ourfirsthomestead.com
Before you begin, gather the following materials and tools:
Image Source: wikihow.com
Wood boards (cedar or redwood are recommended for outdoor use)
Screws or nails
Drill or hammer
Saw
Measuring tape
Sandpaper
Wood sealer or paint (optional)
Solution: How to Build Your Own Wooden Planter
Follow these steps to build your own wooden planter:
Measure and cut the wood boards to the desired dimensions for the planter box.
Assemble the sides of the planter box by attaching the boards together with screws or nails.
Add a bottom piece to the planter box to create a solid base for the soil and plants.
Sand the edges of the planter box to smooth out any rough spots.
Apply a wood sealer or paint to protect the wood from the elements and enhance its appearance.
Information on Caring for a Wooden Planter
To ensure the longevity of your wooden planter, it is important to take proper Care of it. Here are some tips for caring for your wooden planter:
Avoid overwatering your plants, as excess moisture can cause the wood to rot.
Regularly check the condition of the wood and reapply a wood sealer or paint as needed.
Move your planter to a sheltered location during extreme weather conditions to prevent damage.
Conclusion
Building a wooden planter is a fun and rewarding project that can add a touch of natural beauty to your garden. By following the steps outlined in this guide and taking proper care of your planter, you can enjoy lush greenery and colorful blooms for years to come.
FAQs
1. Can I use any type of wood to build a wooden planter?
It is recommended to use rot-resistant woods like cedar or redwood for outdoor wooden planters.
2. How big should I make my wooden planter?
The size of your wooden planter will depend on the space you have available and the types of plants you want to grow.
3. Do I need to line my wooden planter with plastic?
It is not necessary to line your wooden planter with plastic, but it can help protect the wood from moisture and extend its lifespan.
4. Can I paint or stain my wooden planter?
You can paint or stain your wooden planter to match your garden decor or protect the wood from the elements.
5. How often should I water my plants in a wooden planter?
It is important to water your plants in a wooden planter regularly, but be careful not to overwater as this can cause damage to the wood.
6. Can I move my wooden planter around my garden?
Yes, wooden planters are portable and can be moved to different locations in your garden as needed.
7. How long will a wooden planter last?
With proper care and maintenance, a wooden planter can last for many years before needing to be replaced.
how to build a wooden planter


