


Bask in the Sun: Providing Adequate Light
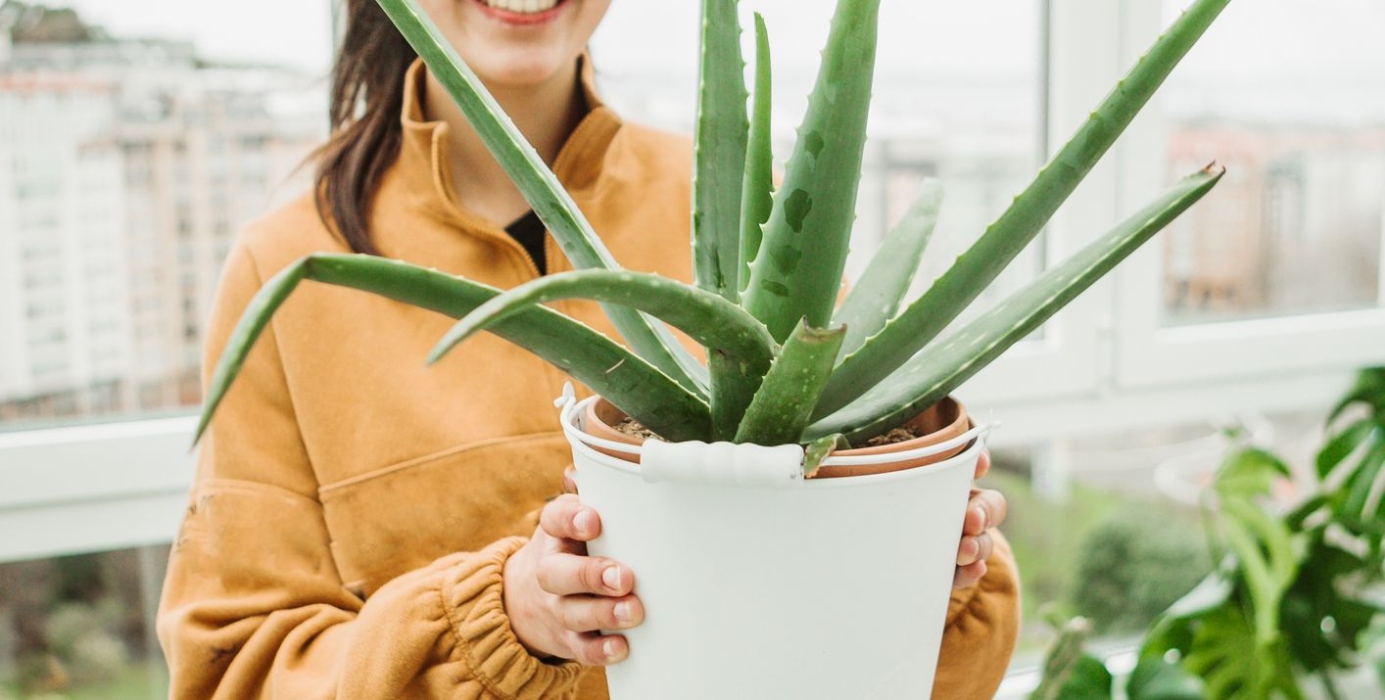
Welcome to the wonderful world of nurturing an indoor Aloe Vera Plant for optimal growth and health! One of the most crucial factors in ensuring the well-being of your Aloe Vera plant is providing it with adequate light. Just like us, plants need sunlight to thrive and grow strong. In this article, we will explore the importance of sunlight for your Aloe Vera plant and how you can ensure it receives the right amount of light to flourish.
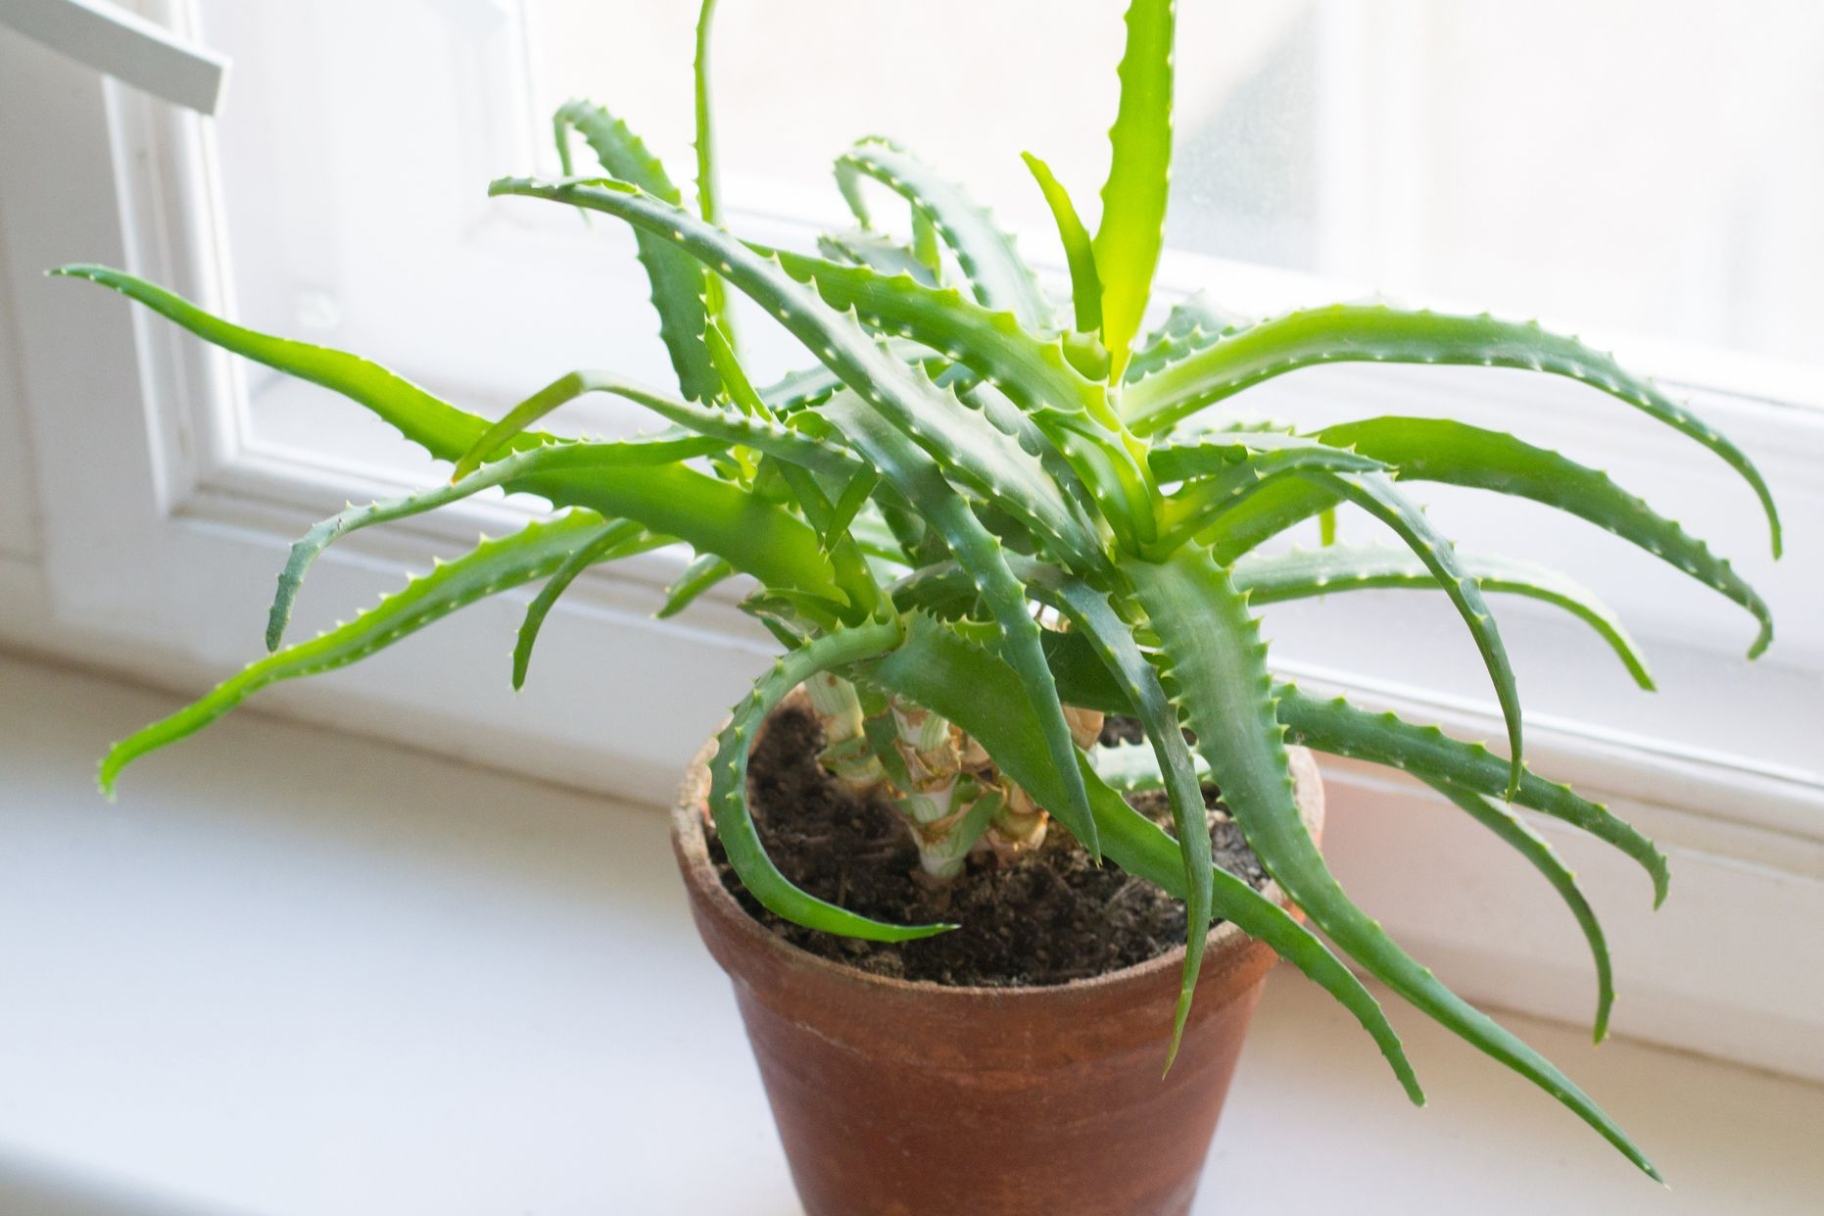
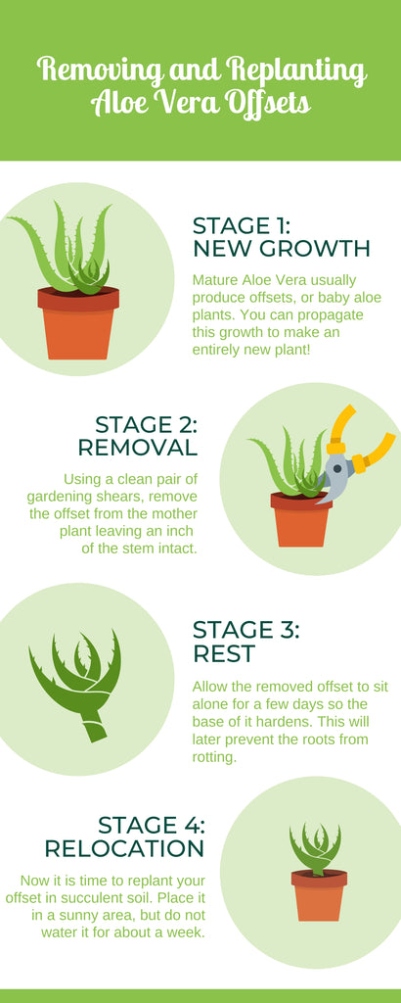
Image Source: hearstapps.com
Aloe Vera plants are native to hot, arid climates and thrive in bright, direct sunlight. When grown indoors, it is essential to mimic their natural habitat by placing them in a location where they can receive plenty of light. Ideally, your Aloe Vera plant should be placed near a sunny window that receives bright, indirect sunlight for most of the day. South or west-facing windows are usually the best options as they tend to get the most sunlight throughout the day.
If you notice that your Aloe Vera plant is not receiving enough light, you may start to see signs of distress. The leaves may begin to turn yellow or brown, and the plant may appear leggy or stretched out. To prevent this from happening, make sure to rotate your plant occasionally to ensure all sides receive equal exposure to sunlight. You can also supplement natural light with artificial grow lights to provide your Aloe Vera plant with the necessary light it needs to thrive.
Image Source: hearstapps.com
During the winter months when sunlight is scarce, it is especially important to pay attention to your Aloe Vera plant’s light needs. Consider moving it closer to a window or investing in a grow light to ensure it continues to receive adequate light throughout the colder months. Remember, a happy Aloe Vera plant is a well-lit Aloe Vera plant!
In conclusion, providing your indoor Aloe Vera plant with adequate light is essential for its optimal growth and health. By placing it in a sunny location near a window or using artificial grow lights, you can ensure that your Aloe Vera plant receives the light it needs to thrive. So, bask in the sun and watch your Aloe Vera plant flourish before your eyes!
Sip, Don’t Drown: Watering Tips for Aloe Vera
Image Source: shopify.com
Welcome to the wonderful world of nurturing an indoor aloe vera Plant for optimal growth and health! One of the most important aspects of caring for your aloe vera plant is ensuring that it receives the right amount of water. While it may seem simple enough, overwatering is one of the most common mistakes that people make when caring for their aloe vera plants. In this article, we will explore some watering tips to help you avoid drowning your beloved plant.
Aloe vera plants are succulents, meaning they store water in their leaves to survive in arid conditions. Because of this, they are extremely sensitive to overwatering. In fact, aloe vera plants are more likely to survive if they are underwatered rather than overwatered. So, how can you ensure that your aloe vera plant gets just the right amount of water? Here are some tips to help you out:
1. Check the Soil Moisture: Before watering your aloe vera plant, always check the moisture level of the soil. Stick your finger about an inch into the soil – if it feels dry, it’s time to water. If it still feels moist, wait a few more days before checking again. Remember, aloe vera plants prefer to dry out between waterings.
2. Choose the Right Pot: Proper drainage is crucial for aloe vera plants. Make sure your pot has drainage holes at the bottom to allow excess water to escape. This will help prevent waterlogged soil, which can lead to root rot.
3. Water Sparingly: When it comes time to water your aloe vera plant, do so sparingly. A good rule of thumb is to water your plant once every 2-3 weeks, depending on the temperature and humidity levels in your Home. It’s better to underwater than overwater, so err on the side of caution.
4. Avoid Standing Water: Never let your aloe vera plant sit in standing water. After watering, make sure to empty the saucer beneath the pot to prevent water from being reabsorbed. This will help prevent root rot and other water-related issues.
5. Pay Attention to the Leaves: One way to tell if your aloe vera plant is getting too much water is by observing the leaves. Overwatered aloe vera plants may develop brown, mushy leaves or black spots. If you notice any of these signs, cut back on watering immediately.
Remember, aloe vera plants are resilient and can survive in less-than-ideal conditions. However, by following these watering tips, you can help ensure that your plant thrives and remains healthy. So, sip, don’t drown – your aloe vera plant will thank you for it!
Potting Perfection: Choosing the Right Soil
Nurturing an indoor aloe vera Plant for optimal growth and health involves many different aspects, including choosing the right soil for your plant. The soil you select can make a big difference in how well your aloe vera thrives, so it’s important to choose wisely.
When it comes to potting your aloe vera plant, a well-draining soil is key. Aloe vera plants are succulents, which means they store water in their leaves and stems, making them especially susceptible to root rot if they are sitting in waterlogged soil. To prevent this, choose a succulent or cactus mix for your aloe vera plant. These mixes are designed to provide excellent drainage, ensuring that excess water can easily flow through the soil and out of the pot.
In addition to good drainage, aloe vera plants also thrive in slightly acidic to neutral soil. You can test the pH of your soil using a simple soil pH test kit, available at most garden centers. If your soil is too acidic or alkaline, you can adjust it by adding lime to raise the pH or sulfur to lower it. A pH level of around 6.0 to 7.0 is ideal for aloe vera plants.
Another important factor to consider when choosing soil for your aloe vera plant is the texture of the soil. Aloe vera plants prefer a loose, sandy soil that allows for good air circulation around the roots. Avoid heavy, compacted soils that can suffocate the roots and prevent proper drainage. A sandy succulent mix is a great choice for aloe vera plants, as it provides the perfect balance of moisture retention and drainage.
When potting your aloe vera plant, make sure to choose a pot with drainage holes in the bottom. This will allow excess water to escape, preventing waterlogged soil and root rot. Fill the pot with your chosen succulent or cactus mix, leaving enough room for the aloe vera plant’s roots and stem. Gently place the plant in the center of the pot and fill in around the roots with more soil, pressing it down lightly to secure the plant in place.
After potting your aloe vera plant, it’s important to monitor the soil moisture levels regularly. Stick your finger into the soil up to the first knuckle to check for moisture. If the soil feels dry, it’s time to water your plant. If it feels moist, wait a few days before checking again. Overwatering is one of the most common mistakes made when caring for aloe vera plants, so it’s important to let the soil dry out between waterings.
In addition to choosing the right soil for your aloe vera plant, it’s also important to repot your plant every couple of years to refresh the soil and provide more room for growth. When repotting, gently remove the plant from its current pot, shake off any excess soil, and inspect the roots for signs of rot or damage. Trim away any dead or rotting roots with clean scissors before repotting the plant in fresh soil.
By choosing the right soil for your aloe vera plant and repotting it as needed, you can help ensure that your plant remains healthy and thriving for years to come. With proper Care and attention, your indoor aloe vera plant will reward you with its beautiful foliage and healing properties. So go ahead and pot your aloe vera plant in the perfect soil, and watch it flourish in your Home.
Trim & Tend: Pruning for Flourishing Foliage
So, you’ve got your indoor Aloe Vera Plant all set up with the perfect potting soil, it’s basking in the sunlight, and you’re watering it just right. But there’s one more crucial step to ensure your plant thrives and that’s pruning. Pruning may sound intimidating, but it’s actually quite simple and essential for optimal growth and health.
Pruning your Aloe Vera plant is important for a few reasons. First and foremost, it helps remove any dead or damaged leaves, which can attract pests and disease if left unchecked. By regularly pruning your plant, you can prevent any potential issues before they have a chance to take hold. Additionally, pruning helps promote new growth by stimulating the plant to produce more shoots and leaves.
To start, you’ll need a clean pair of sharp scissors or pruning shears. Make sure to sterilize your tools with rubbing alcohol before using them to prevent the spread of any diseases. When pruning your Aloe Vera plant, look for any leaves that are yellowing, browning, or shriveled. These are signs that the leaf is dying and should be removed.
To prune a leaf, simply cut it as close to the base of the plant as possible without damaging the surrounding leaves. Make a clean, diagonal cut to ensure the wound heals quickly and cleanly. If you notice any leaves that are starting to grow too close together or are blocking sunlight from reaching other leaves, feel free to trim them back as well.
In addition to pruning dead or damaged leaves, you may also want to trim any offsets or pups that are growing around the base of the plant. These are small plants that sprout from the main plant and can eventually become new, separate Aloe Vera plants. While it’s exciting to see your plant producing new growth, allowing too many pups to grow can crowd the main plant and inhibit its growth. To trim a pup, Carefully separate it from the main plant using a sharp knife or scissors. You can then pot the pup in its own container to grow into a new plant.
Pruning your Aloe Vera plant not only helps keep it looking neat and tidy, but it also encourages healthy growth. By removing dead or damaged leaves, you’re allowing the plant to direct its energy towards producing new, vibrant foliage. Regular pruning also helps prevent the spread of disease and pests, keeping your plant happy and healthy.
So, the next time you’re tending to your indoor Aloe Vera plant, don’t forget to give it a little trim. Your plant will thank you by flourishing with lush, green foliage. Remember, pruning is just another way to show your plant some love and ensure it thrives for years to come. Happy gardening!
how to care for an aloe vera plant inside


